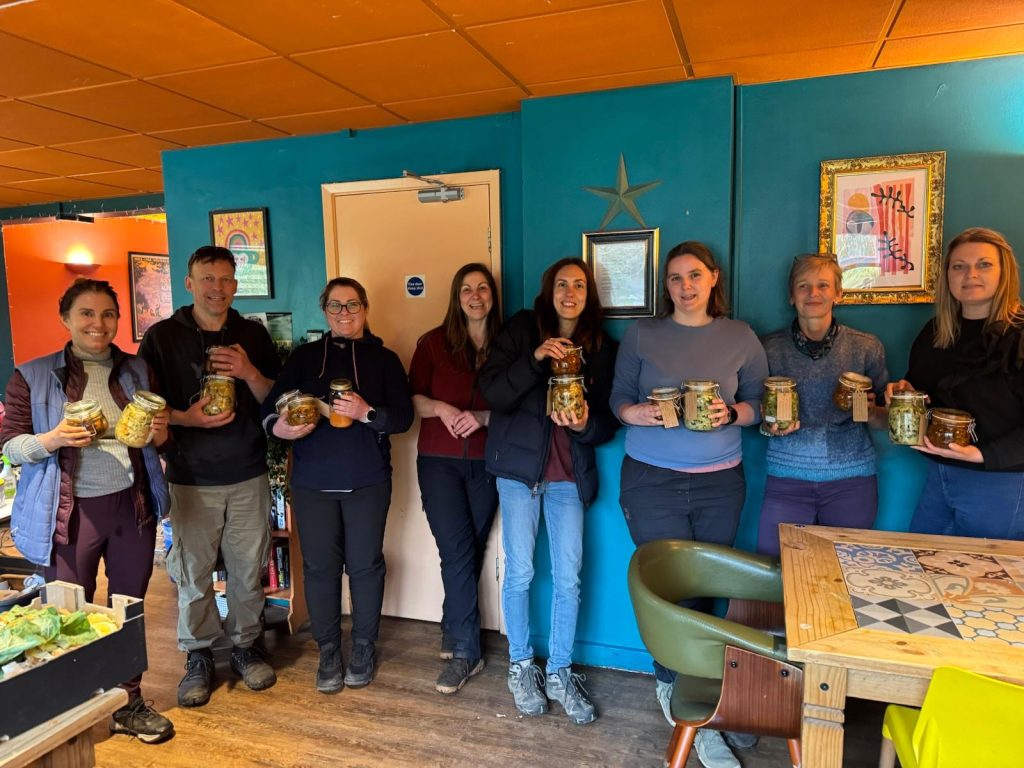
Photo of many delicious and colourful sauerkrauts created at an Autumnal sauerkraut workshop.
Lacto-fermentation
Sauerkraut was the opening door into the fermented world for me 15 years ago. The first ferment I was taught was sauerkraut. I had no idea about fermented foods and sauerkraut was not something I had tried and was surprised when a health food shop I was in had suggested to eat to improve my health. Really?… live, unpasteurised pickles will help me? Well.. here we are 15 years later still down the fermenting world rabbit hole!
I love pickles and I love sauerkraut and ferments became an every day feature in our fridge and lives. What about you?
If you have never fermented vegetables before, this is a good place to start. Sauerkraut is a great way to share how lacto- fermentation works. The lacto part refers to the Lactobacillus species of bacteria that work their magic to create a sauerkraut. I will share more about these incredible microbial friends we have in the lactic acid bacteria another time.
Sauerkraut is using an ancient food technology that is hundreds if not thousands of years old. There are many strains of lactobacillus species of bacteria and we do not know which will be present on the leaves of the cabbage so this way of fermenting is also known as wild fermentation.
How does it work?
This is a simple explanation so you can get to the job in hand done…making your ferment!
When you create your ferment, i.e. chop your cabbage, add salt, massage it and place it in a vessel, you are creating the environment for lots of processes to take place with different Lactobacillus bacteria. It is like creating an ecosystem. The first set of bacteria are the Leuconostoc Mesenteroides, these eat the sugar from the cabbage, and create lactic acid, acetic acid, ethanol and more, they also create carbon dioxide that push the oxygen out of the jar. This starts to lower the pH quite quickly and start to make the ferment less hospitable to pathogens. It is important that your jar is at room temperature for these little fellows to get to work quickly. These get going in the first 24hrs, it is possible to hear hissing from the gas being pushed out from a clip top jar by then sometimes! As the pH drops, different Lactobacillus species will arrive and go, each creating more lactic acid, by day 3 to 14 it can be down to 4.5 (which is food safe as it is below 4.6pH where Clostridium botulinum can survive), after this time the pH can drop to around 3.5pH. So I usually suggest you leave your ferment for 14 days before trying it and then taste it as it goes along the process so you can come to taste and feel the difference in taste, acidity and texture. In the Winter I leave my sauerkraut to ferment for a month.
The percentage salt ratio, the acidification, being at room temperature and being anaerobic all play a part in creating a safely preserved food.
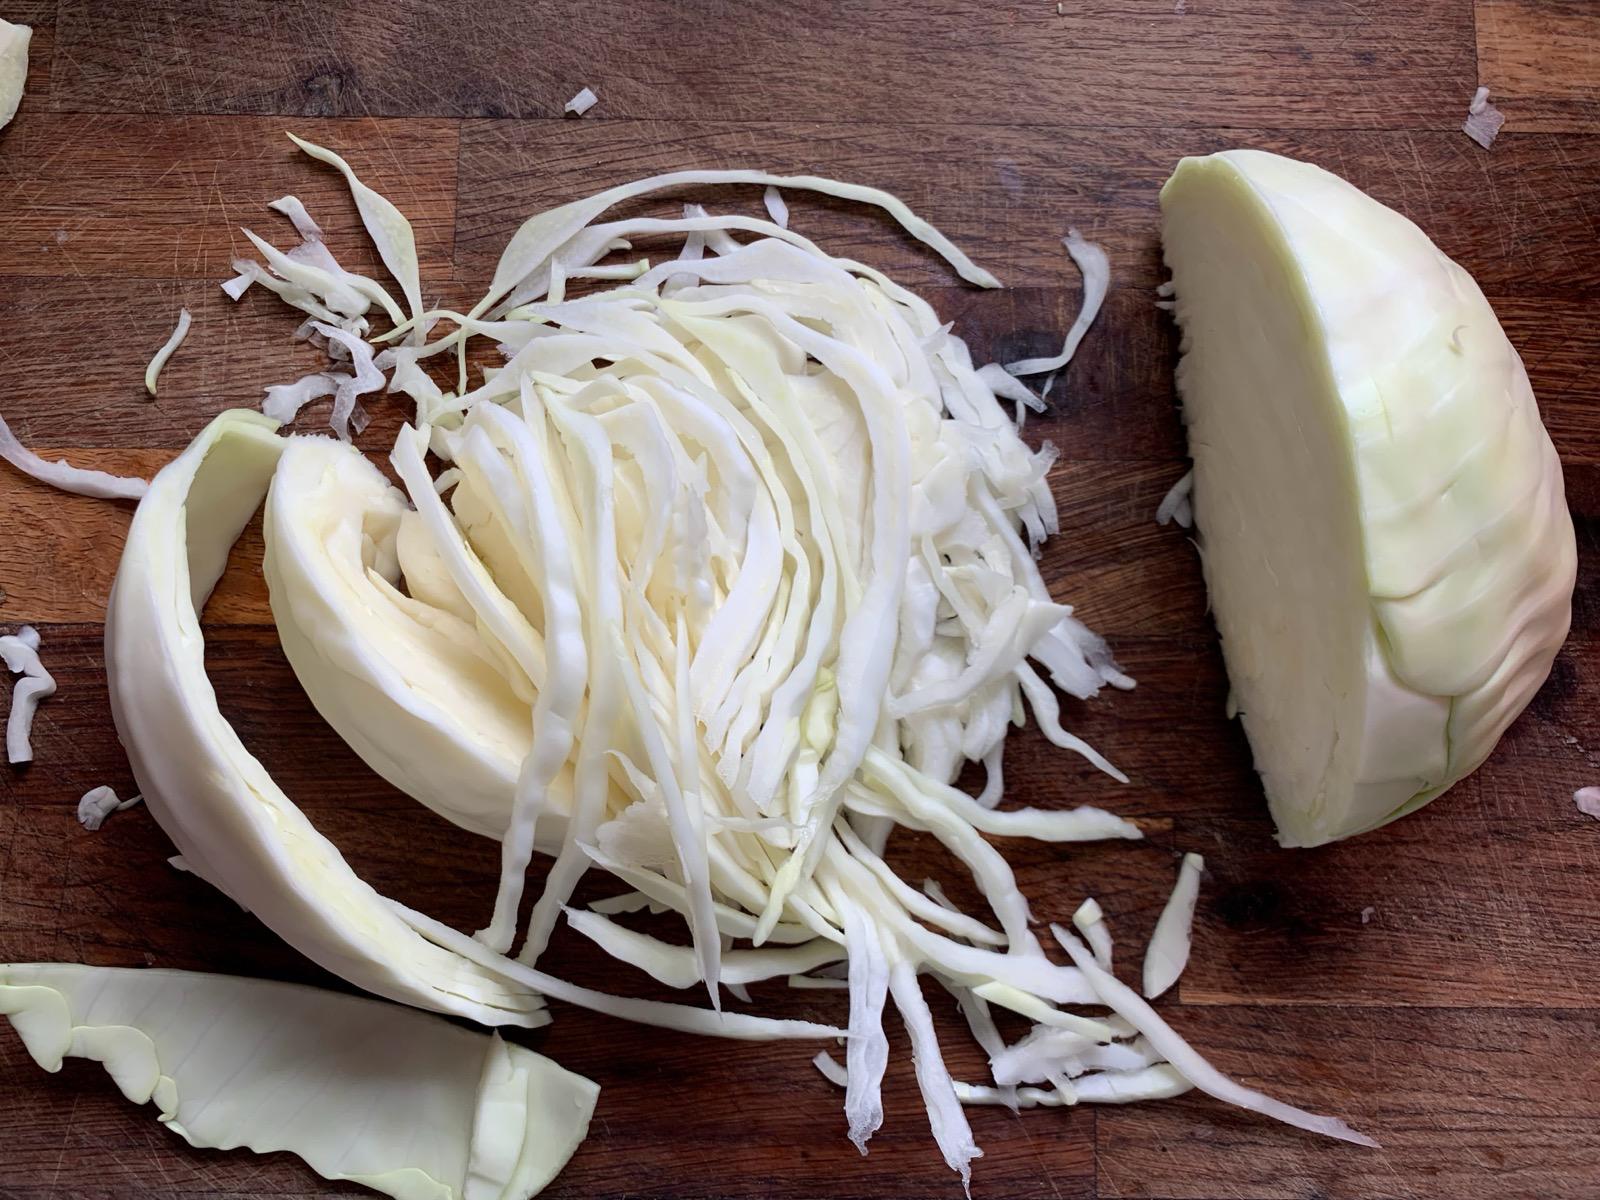
Photo A dutch white cabbage being chopped up for making sauerkraut
Recipe
To create a sauerkraut we are working with a dutch white cabbage, some sea salt and time quite simply. We are working with 2% salt percentage.
Equipment. You need very little!
You will need a chopping board, a large bowl, knife and a 1 litre clip top jar for this recipe.
The cabbage is a medium cabbage about 900g. That will fit into a 1 litre jar with about 2.5cm space at the top of the jar
Ingredients:
1 medium Cabbage (As fresh, as young as you can get and organic if you can)
2% salt (Take the total weight of the cabbage and x 0.02) or another way to put it take the weight divide it by 100 and x by 2) This would be 20g for 1kg of cabbage. It is good to use sea salt if you can.
- Wash the cabbage
- Remove the outer leaves and keep them, cut the cabbage into quarters and cut out the core and keep to one side
- Shred the cabbage
- Add the salt to the cabbage
- Massage the cabbage until there is plenty of brine in the bottom of the bowl or when you can lift the cabbage and squeeze the cabbage like a sponge and there is lots of liquid. This can take 12 to 15 minutes
- Pack the jar, pressing the cabbage down to squeeze out oxygen and so that the cabbage is under the brine
- Use an outer cabbage like a blanket to press all the cabbage under the brine and use a core to keep the cabbage under the brine “Under the Brine and then you are fine”. Make sure there is brine over the chopped cabbage and about 2.5cms of space at the top of the jar for the ferment.
- Seal the clip top jar and place it with a bowl underneath the ferment to catch any brine that may be pushed out by the bacteria creating Co2
- The clip top jars are self burping, meaning the gas can be released itself. Depending on the weather, and how lively the ferment is, the ferment may need to be “burped” and just release the gas
- Try your ferment after 14 days or so and when you are happy with the level of tang and texture of the sauerkraut then you can jar your sauerkraut into smaller jars or just pop it into the fridge which will then slow the fermentation down.
- Sauerkraut can keep for up to 10 to 12 months in the back of the fridge in a jar with no air in.
- Once opened enjoy! Always use a clean fork and press down your ferment and try to not leave too much air in the jar where it can oxidise and the colour can alter and the flavour too.
Try and experiment with adding different fruits and vegetables like carrot, fennel, leeks, apples, onion. If you use carrot and apple say in a sauerkraut, use under 25% of the total amount of veg because they change how fast the ferment will ferment and it will not last as long as a sauerkraut made with just cabbage would. Herbs can really flavour a sauerkraut nicely, like mint, oregano, thyme and ginger, chilli and garlic can really add some flavour. The fermentation process does mellow and create more complex flavours so it is worth experimenting and finding out what you find floats your boat. The fermentation process also changes over time so it is worth trying your ferments over time to see what you prefer.
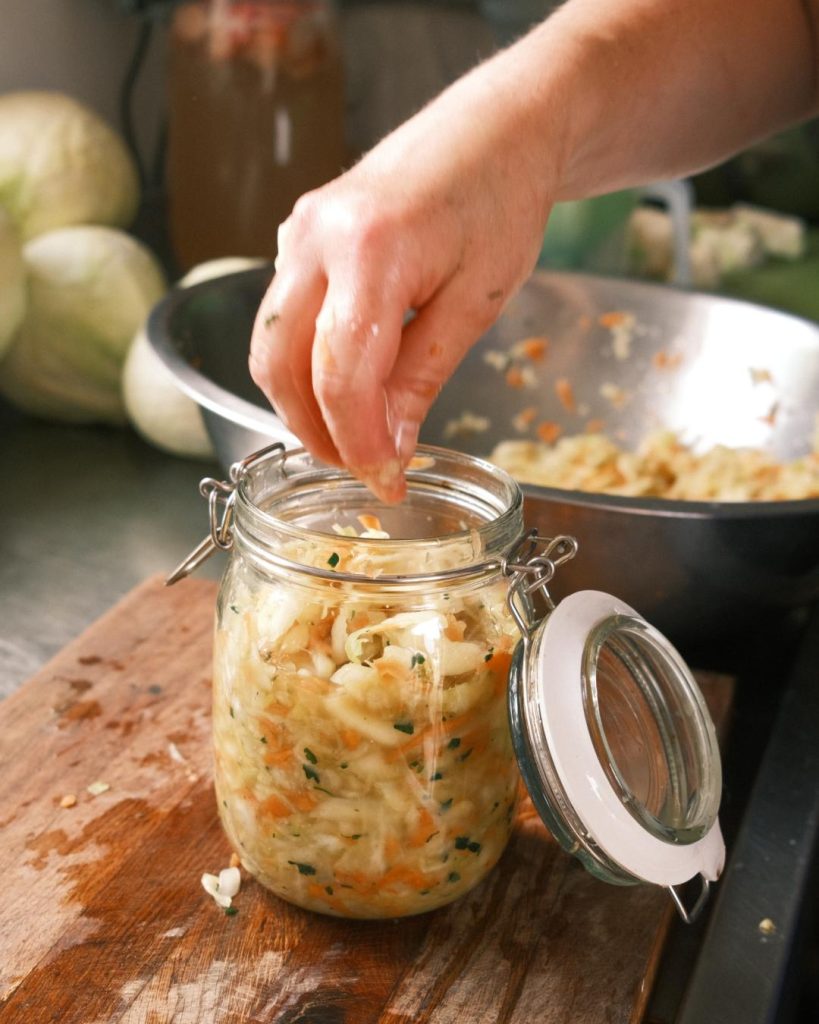
Photo credit Ben Farr IFSOBCZWHY – Placing the cabbage into the clip top jar
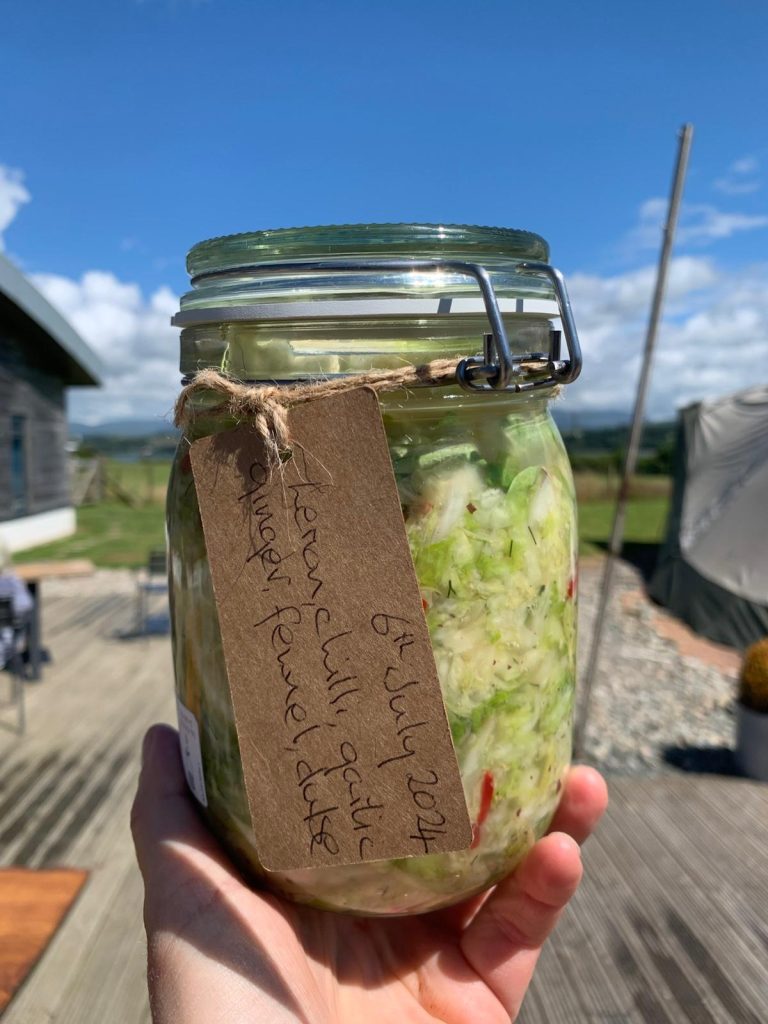
The finished work of art! The vegetables should be below the brine, and there should be a bit of space at the top. This was a sauerkraut created at Halen Mon for a sauerkraut workshop.
Just things to note:
If you aren’t used to fermented foods, please start with small amounts and don’t go crazy! Your digestive system may need a little time to adjust to fermented foods. Please note that not everybody can tolerate fermented foods for various reasons, so when you start to eat ferments just pay attention to your body.
Trouble Shooting
Please trust your nose and intuition!
If you have been on one of my workshops please message me if you need help!
If there are a range of coloured moulds in the jar on your ferment please compost it. It is not worth the risk.
If your ferment is looking like it is exposed before it is fermented, this is not a good thing… “Under the brine and then you are fine!” Please press it down beneath the brine as soon as this happens. It is worth just keeping an eye on your ferment as it ferments.
If Kahm yeast arrives on your ferment, this is a thin white layer of yeast then scrape the yeast off. Kahm yeast is harmless in itself but it does create a surface for mould to arrive on if not looked after as soon as it arrives. I recommend consuming the ferment as soon as you can as the kahm will come back and it alters the flavour of the ferment. It is possible to deter the kahm yeast by spraying a diluted vinegar solution around the top of the jar.
I really hope you enjoy your fermentation journey! Please check events for further workshops or get in touch for a bespoke workshop if you have a work place, a community or a group of friends that might like to explore the world of fermentation!